Posted on August 12, 2010 in General, Saab Tricks by adminComments Off on Saab 9^5 HVAC Recirculation Air Motor Repair

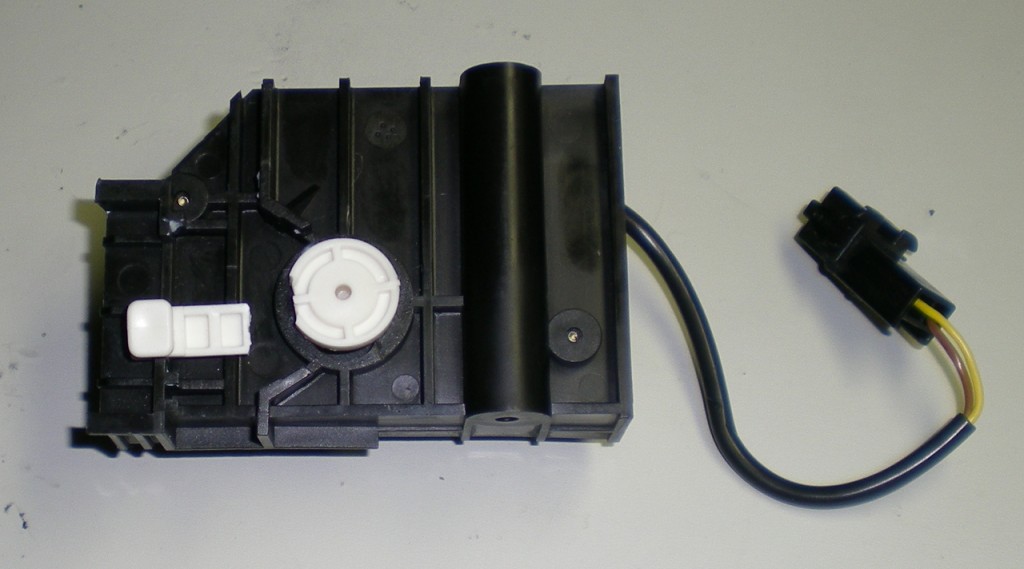
Pretty much every early model year Saab 9^5 owner is going to have to deal with this one sooner or later. The lever actuating arm on the recirculation control motor snaps off because of dodgy design and improper material selection. This one is a candidate for the “Made by Monkeys” blog at the Design News web site.  There are no symptoms except the A/C doesn’t work so well when first starting up a car that’s been sitting in the sun for a while, as the recirc flap defaults to fresh air mode when the lever arm breaks off.

Recirculation motor broken actuating arm

Recirculation motor with broken actuating arm

The repair or replacement of this item is fairly easy, as repairs to Saab 9^5 HVAC systems go.  Here is a quick outline of what has to be done:

  • Remove passenger (LHD cars) footwell cover from left wall;
  • Remove under dash cover;
  • Remove glove compartment;
  • Remove recirculation motor (broken arm usually drops out when motor is removed);
  • Repair motor;
  • Replace motor and reassemble everything in reverse order.

For early (pre-2001) 9^5’s it’s possible that the motor could be non-operative due to a burned out resistor.  If your ACC calibration failed with a code 21 this indicates a failed recirculator motor.  Replacement may be your only option on the later cars as mine (MY2001) has the motor sonic welded together, there’s no practical way to disassemble it to replace the failed 18 ohm resistor that tends to happen on the early cars.  It’s easy enough to test the motor on the bench with a 12V power supply.  Apply voltage one way, then reverse the polarity to move the motor back in the other direction.  You will need to do this in any case in order to move the shaft to a middle position if you effect the repair I listed below.  A replacement actuator arm part (part number 4869426) can be found at www.gmpartsdepartment.com for about $USD20 last time I checked.  Since this didn’t look like too much trouble to frig a repair, and the force needed to move the recirculation flap is pretty small, I decided to try a fix.

Detailed Repair Instructions

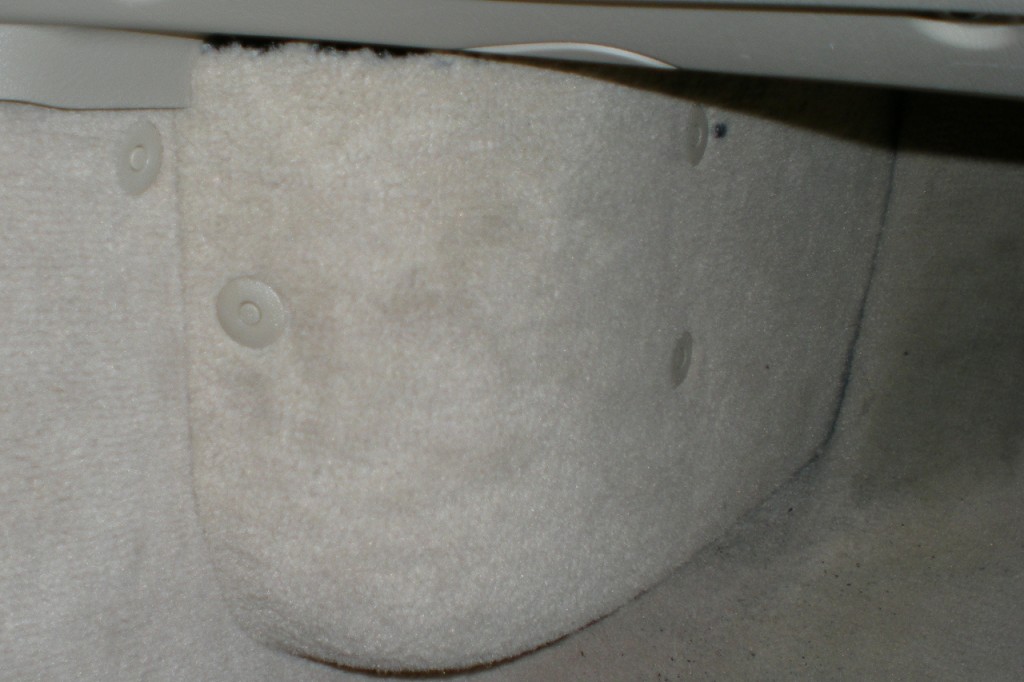
Remove passenger side footwell cover by removing 3 plastic anchor pins:

Passenger Footwell cover for HVAC

Passenger Footwell Cover for HVAC

WARNING: don’t try to forcefully pull out the 3 clips!  They come out really easy if you know the secret: use a small screwdriver and push in the center pin about 1/8″.  It should click and stop.  At that point the clip is released and should just pull right out.  For reassembly, push the center pin out from the inside of the clip.  Insert the clip and pin back into its hole, and depress the center pin flush in order to lock in the clip.  (Sure wish we had these on the Saab 9000!)  Remove the cover, and note the locating pin behind the upper plastic clip.

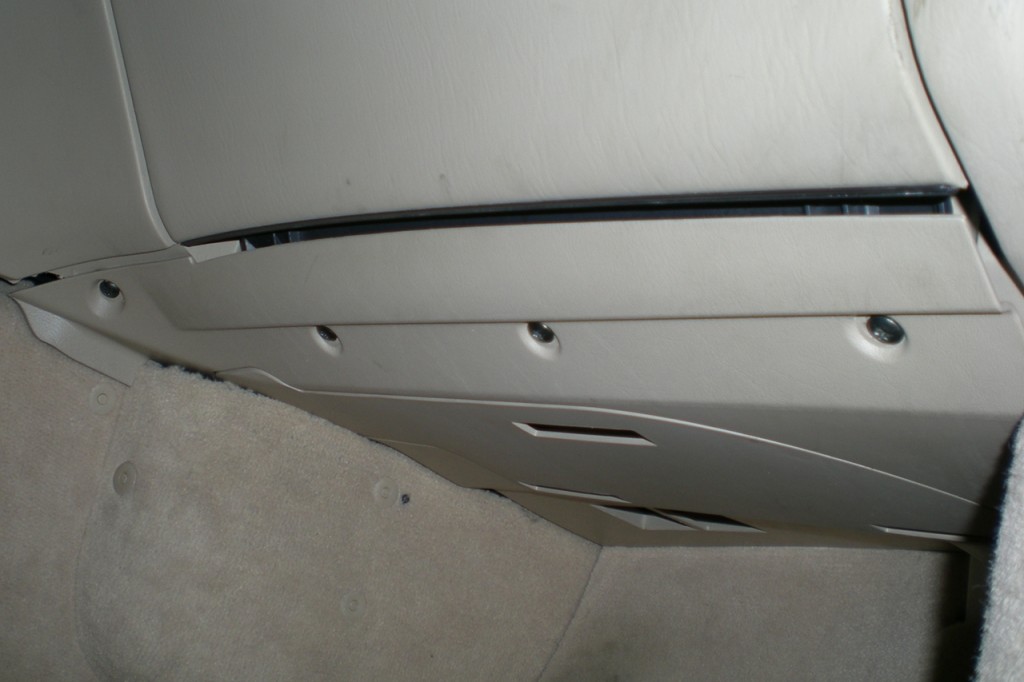
Remove under dash cover by removing 4 T25 screws as shown below:

under dash panel

Passenger side under dash panel mounting screws

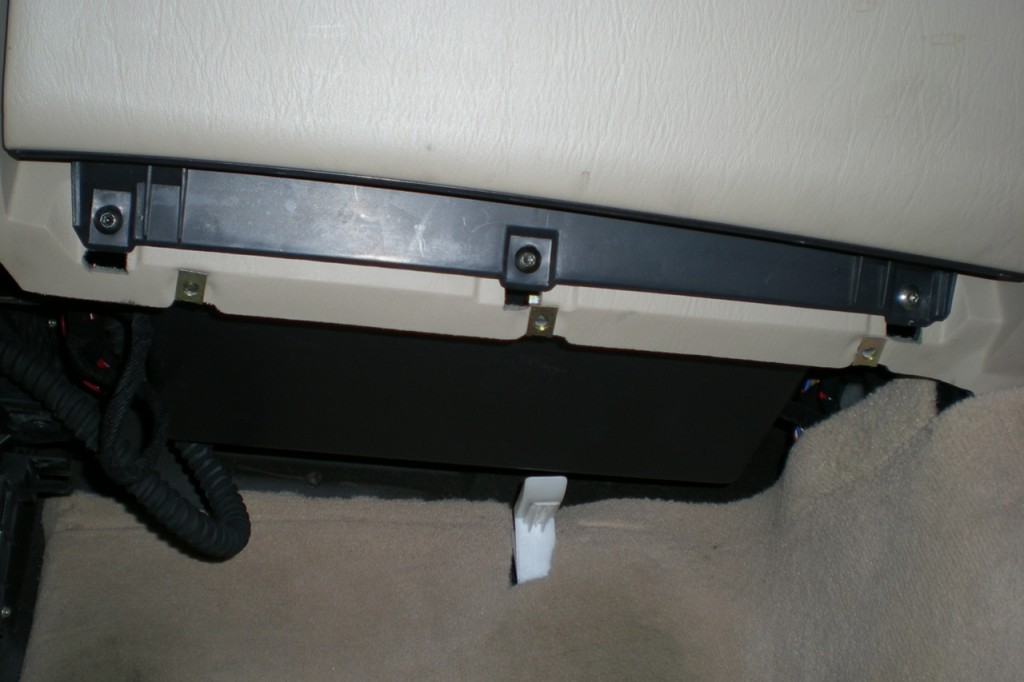
Remove the glove compartment by removing 3 screws at the bottom:

Glove compartment lower mounting screws

Glove compartment lower mounting screws

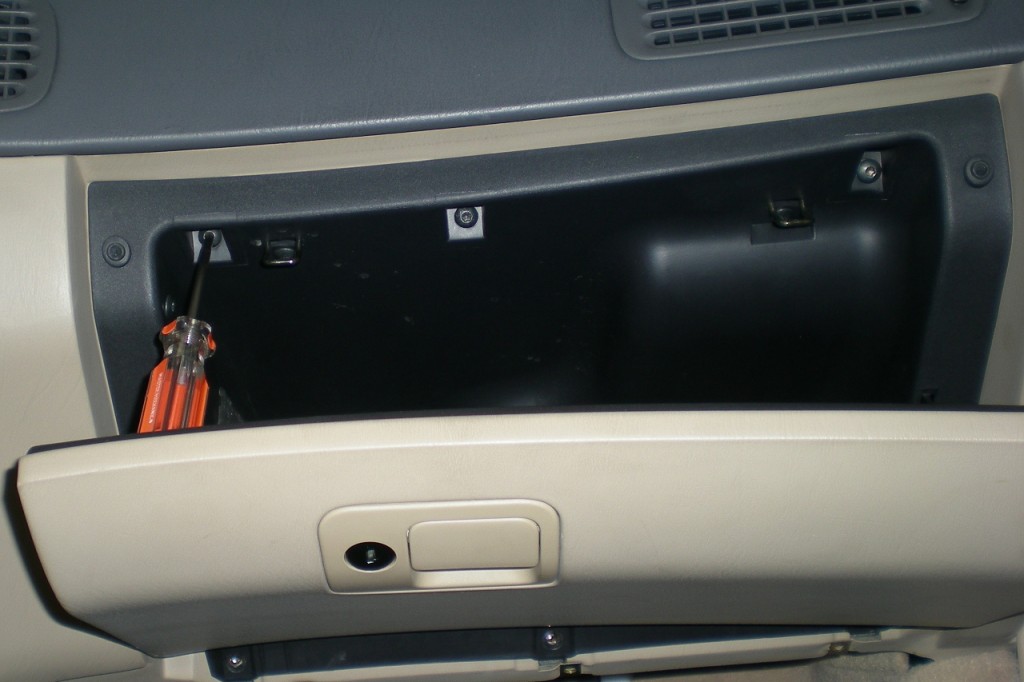
Then remove the three screws behind the door at the top:

Glove compartment upper mounting screws

Glove compartment upper mounting screws

Gently pull the glove compartment forward, and disconnect the two leads for the glove compartment light and the small hose for the cooling air.  Remove the glove compartment from the car, and now you should have full access to the right side of the air box.

Air diverter and recirculation actuator motors

Air Diverter and Recirculation Actuator Motors

Disconnect the electrical connector for the recirculation motor, and remove the connector from the bracket.  Remove the two 6mm/Philips screws holding the motor in (the left screw is deep inside the boss shown, use a #2 Philips on this one) and remove the motor.  Replace the broken actuator arm and reassemble.  Or, if you are cheap like me, repair the arm and then reassemble.

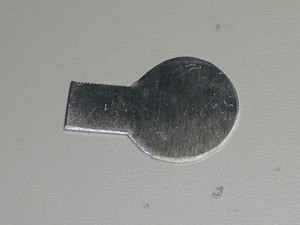
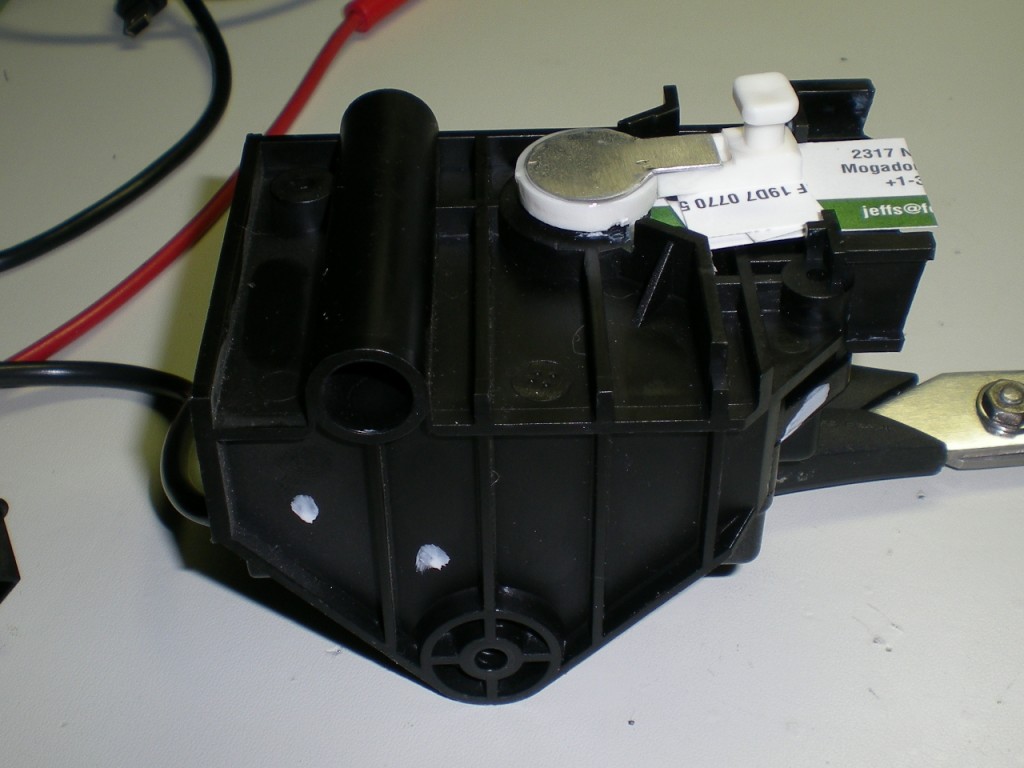
I made up a little piece of 0.025″ thick aluminum and epoxied it to the motor and broken shaft:

Arm Reinforcement piece

Arm Reinforcement Piece

Repaired motor

Repaired Recirculation Motor

I used a clear epoxy. JB Weld would probably work as well.  Shim the broken arm in place until the epoxy sets, then remove the bits while you still can to keep the epoxy from creating a mess by sticking to the shims, then be patient and let the epoxy fully harden.  To ease reassembly, use the power supply to run the shaft to its full CCW position (this is the default position of the recirculator flap).

Update, July 2012:

Seems the epoxy didn’t stick too well to the nylon material the arm is made out of.  So rather than a chemical solution this time I took a mechanical approach.  I had some miniature “Plastite” screws I’d used on a recent project so just used some of these, along with a little more metal bending, to secure the arm to the motor.  McMaster-Carr has them.  You’ll also need a T-5 Torx® driver and a 1.25mm drill bit to complete the work.  So far with two road trips today in 90°+ weather everything is working fine.  This is what the latest repair looks like:

Recirculator actuator servo, second repair attempt

Have fun!
Posted on August 9, 2010 in General, Saab Tricks by adminComments Off on Saab 9000 Belt Tensioner Compression Tool

Update January 2021: I am no longer making belt tensioner tools.  We have sold the shop and moved overseas to Taiwan (long story…)  This particular tool is not hard to make on your own if you have some basic tools handy.  A torch or little wire feed welder helps a lot to simplify construction but one could be designed just using bolt together construction I’m sure.  We have also sold our last Saab (cry…cry…).  But fortunately (or unfortunately as the case may be) there is still a Saab dealership near us in Taichung City, Taiwan.  Go figure…

Update June, 2019:  I’ve just shipped the last tool I have available.  Currently we are preparing to move and all of my shop (what’s left of it) is packed away.  Also my acetylene regulator went bad and I haven’t replaced it yet so I’m out of the tool making business for the foreseeable future.

NOTE: if you are having issues with the serpentine belt “walking” off the A/C pulley or any of the other accessories there’s a very good chance your tensioner is buggered.  This happened on my ’96 9000.  The rubber bellows on the tensioner had become torn and water got into the cylinder and damaged it.

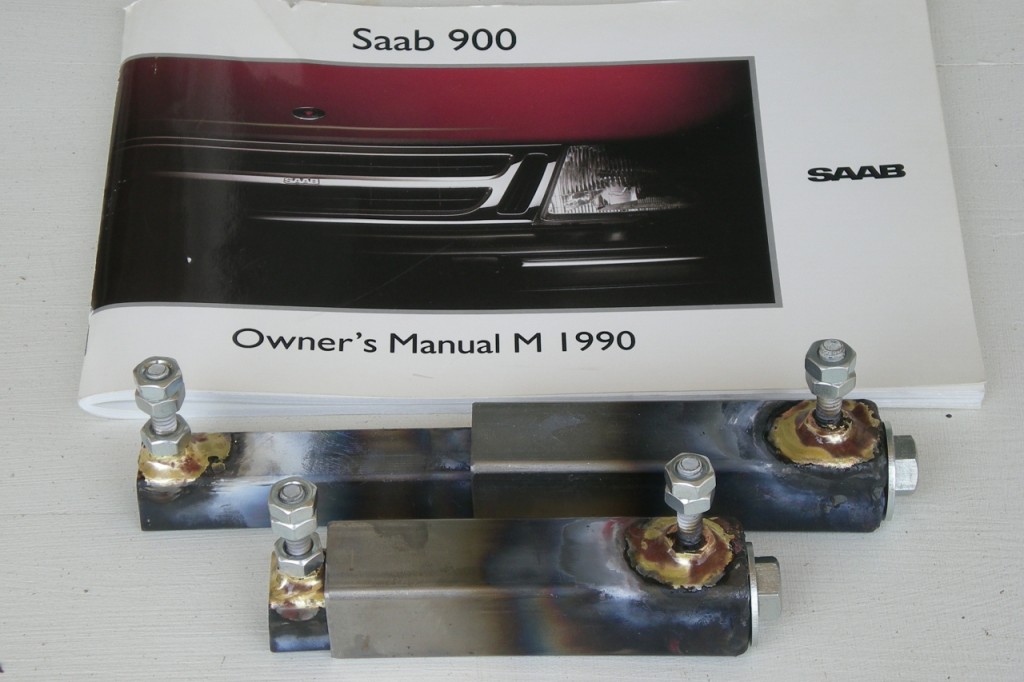
With several drivers in the family, and a newbie driver on the way, vehicle maintenance is a rather sore topic at Fairway Academy. We bought our first Saab in 1995 and the disease has simply worsened since then. The current fleet includes a couple of Saab 9000 models. Changing the serpentine belt has always been an adventure since we don’t have the special tool used to either compress or retain the automatic belt tensioner. Faced with some significant work on the latest addition to the fleet I finally decided to try to obtain one of these devices. Failing that, the next step was to simply build one of our own. It came out so well, at least as nice as the official Saab tool used to compress the tensioner, that I had a request right away from someone if I could also make one for them. Well, here it is:

Saab 9000 belt tensioner compression tool

Saab 9000 belt tensioner compression tool

I have a few of these made up and enough material on hand for a few more. If you are interested in obtaining one ($35USD incl. shipping in USA) please send a message to the administrator at jeffs@fairwayacademy.org.

Update, March 2014:  Due to demand  I have made another batch of these and currently have a couple extra tools left over for immediate shipment if anyone is interested in obtaining one.  Glad to see there are still some 9000’s running around out there.  Also I’ve had some feedback from users about using the tool, see below for instructions.

9K_tensioner_slots_DSCN0862

Slot locations for attaching tensioner compression tools

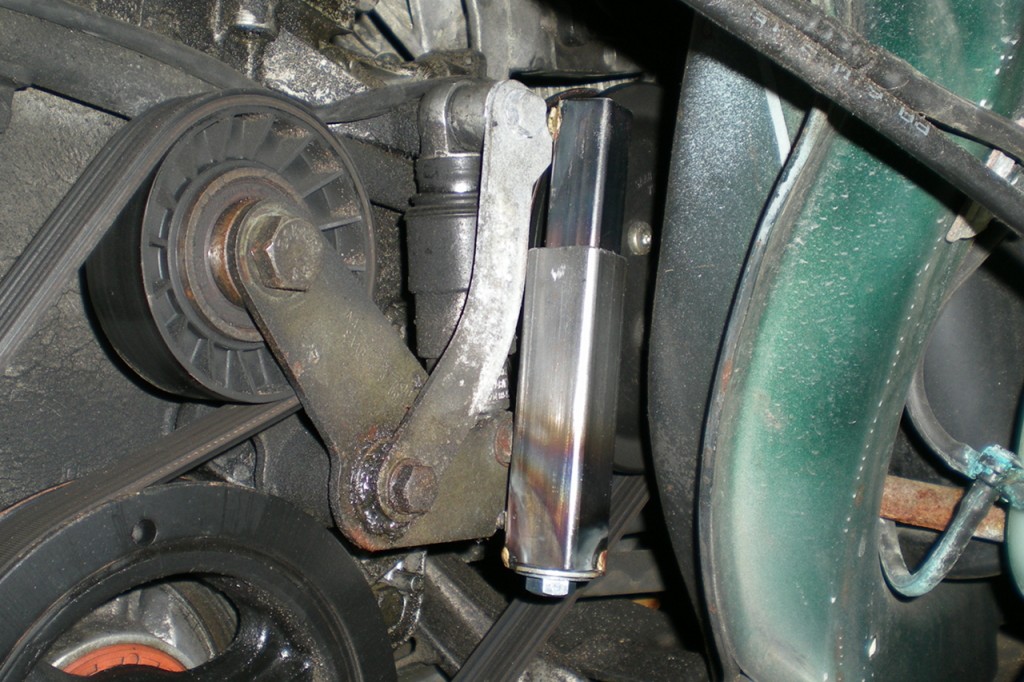
Be careful to note the locations of the two notches or slots in the serpentine belt tensioner brackets, one located at each end of the spring tensioner device.  The tool is designed to be attached to these slots with the bolt end facing down, as shown below:

9K_tool_DSCN0866

Belt tensioner tool in place, ready to compress the automatic tensioner.

Once properly fitted to the tensioner bracket, use a ratchet with an extension to gently tighten the tool, compressing the tensioner just enough to relieve the tension on the serpentine belt.  NOTE: THE TOOL CAN BE DAMAGED BY OVERTIGHTENING!  I purposely designed this tool to self destruct if abused in order to prevent damage to the belt tensioner and its mounting brackets.  You bend that bugger and you’ll never get the belt to stay on and you’ll have to replace the whole kit.  Note also that the tool was designed to be used only one way, with the bolt on the bottom as shown.  If you are cheating and trying to use it from the top without taking out the wing liner you risk damaging the tool since it won’t fit as closely to the bracket as it will when oriented with the bottom down.  Note in the picture above how there is a bit of an offset between the moving and fixed parts of the tensioner bracket.  Also if you are replacing the idler pulley on the tensioner arm loosen the bolt (it has left handed threads by the way) prior to attaching and using the tensioner compression tool to avoid damaging the tool- sometimes it takes a LOT of torque to get that bolt loose, and you’ll need the belt tight in order to have something to work against.